My mini project to self host my digital assets concluded with a very clunky setup. The main issue was the proxying of traffic to my MacMini (the server) via my router’s port forwarding capabilities.
This is what the setup looked like:
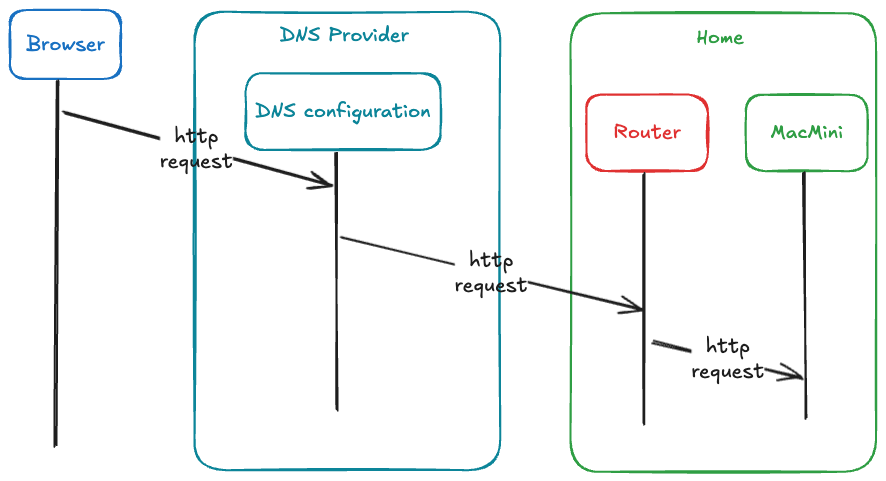
After posting about some thoughts early this week, some things became apparent. Besides the security considerations, this router port forwarding setup was not reliable enough. I heard from several people that the blog was unreachable 😞.
So with some suggestions from Bsky friends, I dived into CloudFlare.
Now, I should have done this from the get go. But I wanted to go as far as possible with just what I had at home.
Without having used CloudFlare before, I jumped into its tunnel documentation. Their documentation is pretty great, so things got underway. But not without hiccups.
After transferring the nameservers from my DNS provider to CloudFlare, I got into setting up the tunnel. This was fairly straight forward. Installed their cloudflared app using homebrew. And everything was ready to go.
The challenges came along with my Nginx configuration. I had to mess around with it running as root to enable port 443 when I set up LetsEncrypt certificates before. And trying to revert to a non-root user to run it got bumpy.
Somehow I was able to get one of my apps working, but not all of them. I couldn’t understand what was going on. It was like my Nginx config changes were not taking effect. So finally I decided to do the simple thing and restart my MacMini. After that, I got Docker running and Nginx as a non-root user. And everything started working.
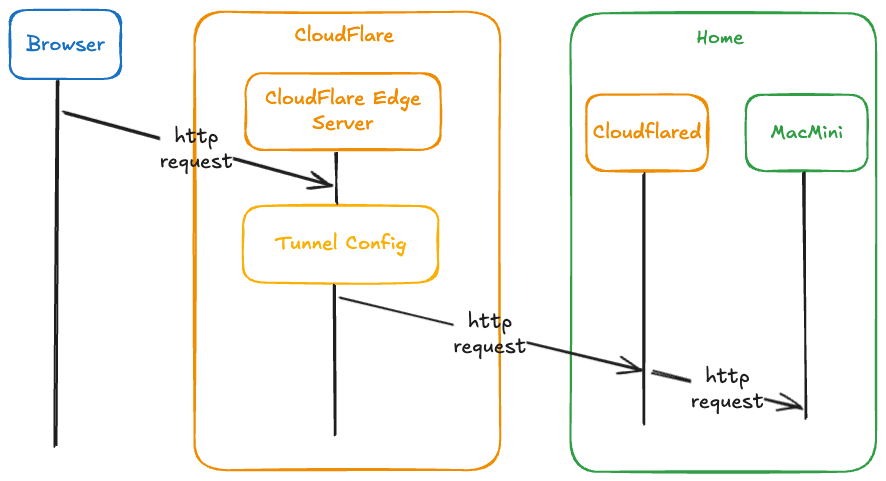
So here is the final setup. A lot more robust and reliable. And without too much effort in the end ☺️.